Hello friends, in this article, we will talk about how we can make photo and video operations with Swift. In almost every application, we ask for media from the user. This is why this issue is important here.
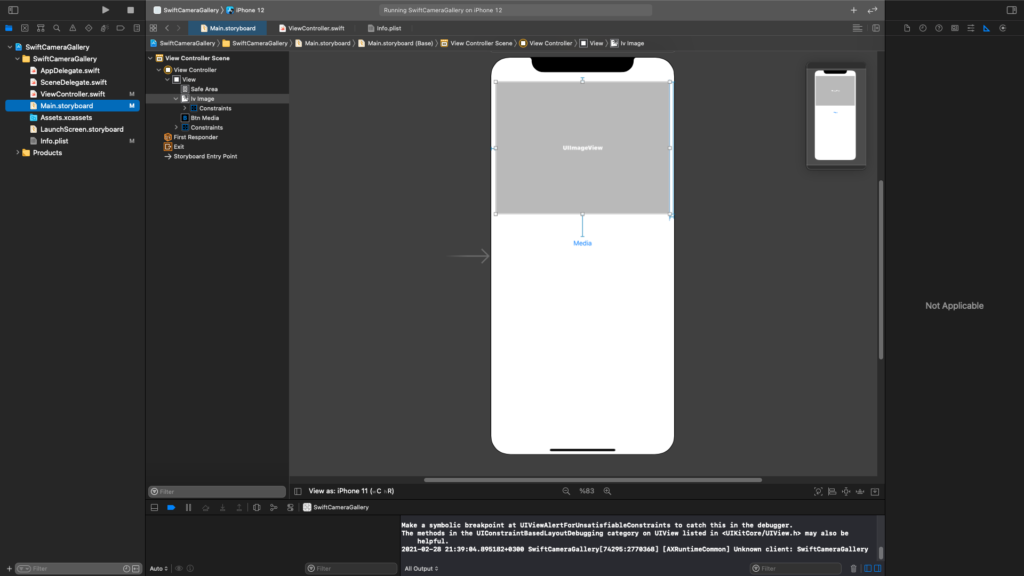
This example will be an image at the top and a button below. When the user presses the button, we will request a photo or picture from the camera or gallery. We need to ask the user for permission to access the phone’s camera or gallery. For this, we have to write the necessary permissions from the info.plist file. I entered here as an example. It is necessary to pay attention to these while throwing the application to the stores. You need to explain exactly what you’re going to use it for or Apple may refuse.

Sample screen design for this application is as follows.

Then we can start writing code. First we need to create a UIImagePicker. With this image picker, we will be able to access the phone’s camera or gallery. If you only work with images, you can add image “public.image” in UIImagePicker media types, but if you also allow the user to add videos, you need to add “public.movie”. Then, when you click the button, we bring up an Action Sheet. Here we are asking whether the user will choose the media from the camera or the gallery. Accordingly, we change the source type of UIImagePicker.
After the user selects one of the camera or gallery, he falls into the didFinishPickingMediaWithInfo function of the UIImgaePicker. The ViewController we use must inherit from the UIImagePickerControllerDelegate, UINavigationControllerDelegate interfaces to fall into this. After falling into the function, you can set here according to the type of media. Another process is that you can take the user’s status after editing the photo or video.
If the user has selected an image, we can show it directly with a UIImageView, but if the user has chosen you can show it with AVPlayer or a pod. You can find a detailed article about AVPlayer in the following articles.
//
//  ViewController.swift
//  SwiftCameraGallery
//
//  Created by Omer Sezer on 28.02.2021.
//

import UIKit

class ViewController: UIViewController {

    @IBOutlet weak var ivImage: UIImageView!
    @IBOutlet weak var btnMedia: UIButton!

    let imagePicker = UIImagePickerController()

    override func viewDidLoad() {
        super.viewDidLoad()

        imagePicker.delegate = self
        imagePicker.sourceType = .photoLibrary
        imagePicker.mediaTypes = ["public.image", "public.movie"]

        btnMedia.addTarget(self, action: #selector(onBtnMediaClicked(_:)), for: .touchUpInside)
    }

    @objc func onBtnMediaClicked(_ sender: UIButton) {
        let optionMenu = UIAlertController(title: nil, message: nil, preferredStyle: .actionSheet)

        let btnCamera = UIAlertAction(title: "Kamera", style: .default) { (action) in
            self.imagePicker.sourceType = .camera
            self.present(self.imagePicker, animated: true)
        }

        let btnGallery = UIAlertAction(title: "Galeri", style: .default) { (action) in
            self.imagePicker.sourceType = .photoLibrary
            self.present(self.imagePicker, animated: true)
        }

        let btnCancel = UIAlertAction(title: "Vazgeç", style: .destructive) { (action) in

        }
        optionMenu.addAction(btnCamera)
        optionMenu.addAction(btnGallery)
        optionMenu.addAction(btnCancel)
        self.present(optionMenu, animated: true)
    }

}

extension ViewController: UIImagePickerControllerDelegate {
    func imagePickerController(_ picker: UIImagePickerController, didFinishPickingMediaWithInfo info: [UIImagePickerController.InfoKey : Any]) {
        let mediaType = info[.mediaType] as? String
        switch mediaType {
        case "public.movie":
            if let videoUrl = info[.mediaURL] as? NSURL {
                // TODO : set video to avplayer
                print(videoUrl)
            }
        case "public.image":
            if let image = info[.originalImage] as? UIImage {
                ivImage.image = image
            }
        default:
            break
        }
        self.dismiss(animated: true)
    }
}

extension ViewController: UINavigationControllerDelegate {

}
The screen output is as follows.

If you have questions, you can reach by e-mail or comment. Good work.
Leave a Reply