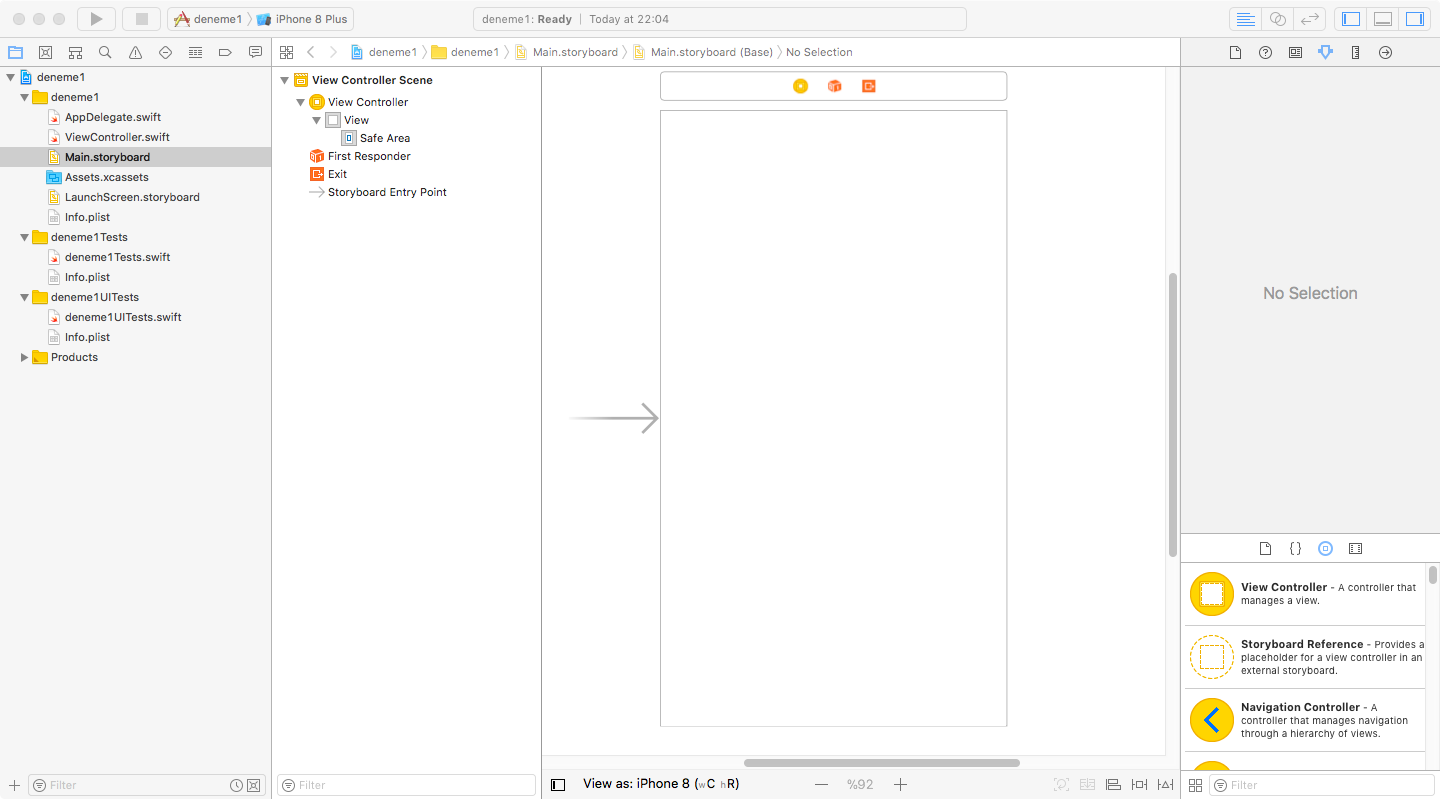
Hello. In this article I will talk about outlet and action differences for friends who have just started Swift. Actually, this difference is so simple that sometimes it can get us in trouble. Some friends may not even know where these preferences come from. I will tell from the beginning. First you need to open a project in XCode. When you open the project you will see a screen like this. This page is where our project information is located. We have no business with this page right now. We have more work with Main.storyboard.
If we open the Main.storyboard screen, we will see a screen like this. We can design this screen, we can control the page controller. We will put the controller here and do the tests. First, we assign a button. When we click on the round yellow button on the page design to assign the button, the controller on the right side is the bottom. We have to choose the button from here. When we write a button to the search section, it is already exiting directly. We use the drag and drop method to drop the button. After that, I make a label so that the outlet and the action are different.
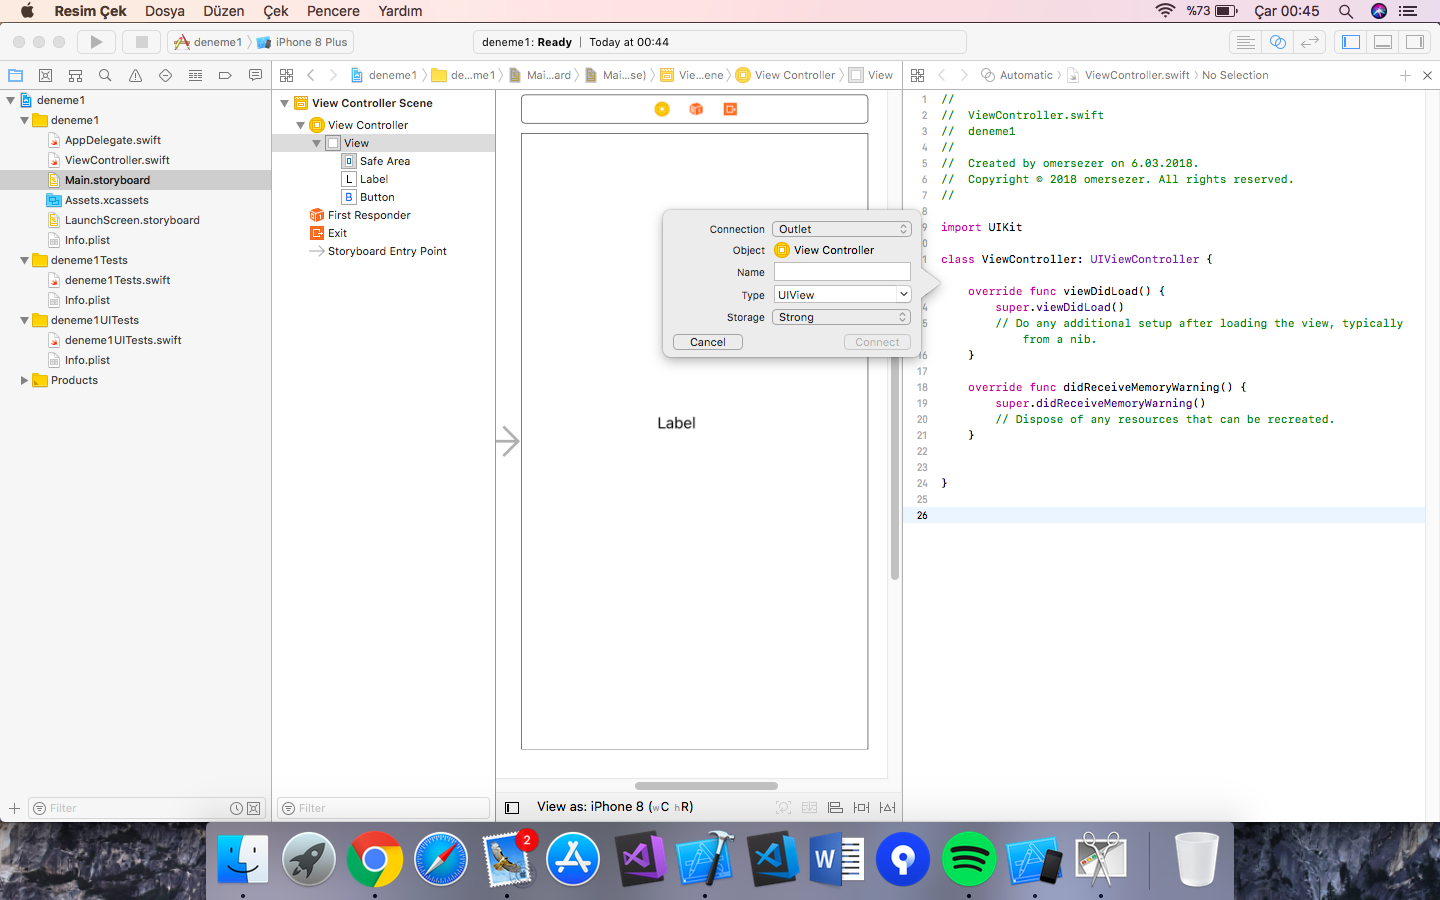
We need to assign the button and label to the class with the left mouse button while holding down the command key. When you leave it off, there is a small option screen. This screen has a connection option. There are outlet and action options here. The difference is that when we select the outlet we change the controller’s physical properties. If Action is an event, we will write it. So when I click on the label or touch the button, I write. I’m going to change the text on the label when the button is touched. So I choose the label as outlet. Button is the action. Name is the name we will give.
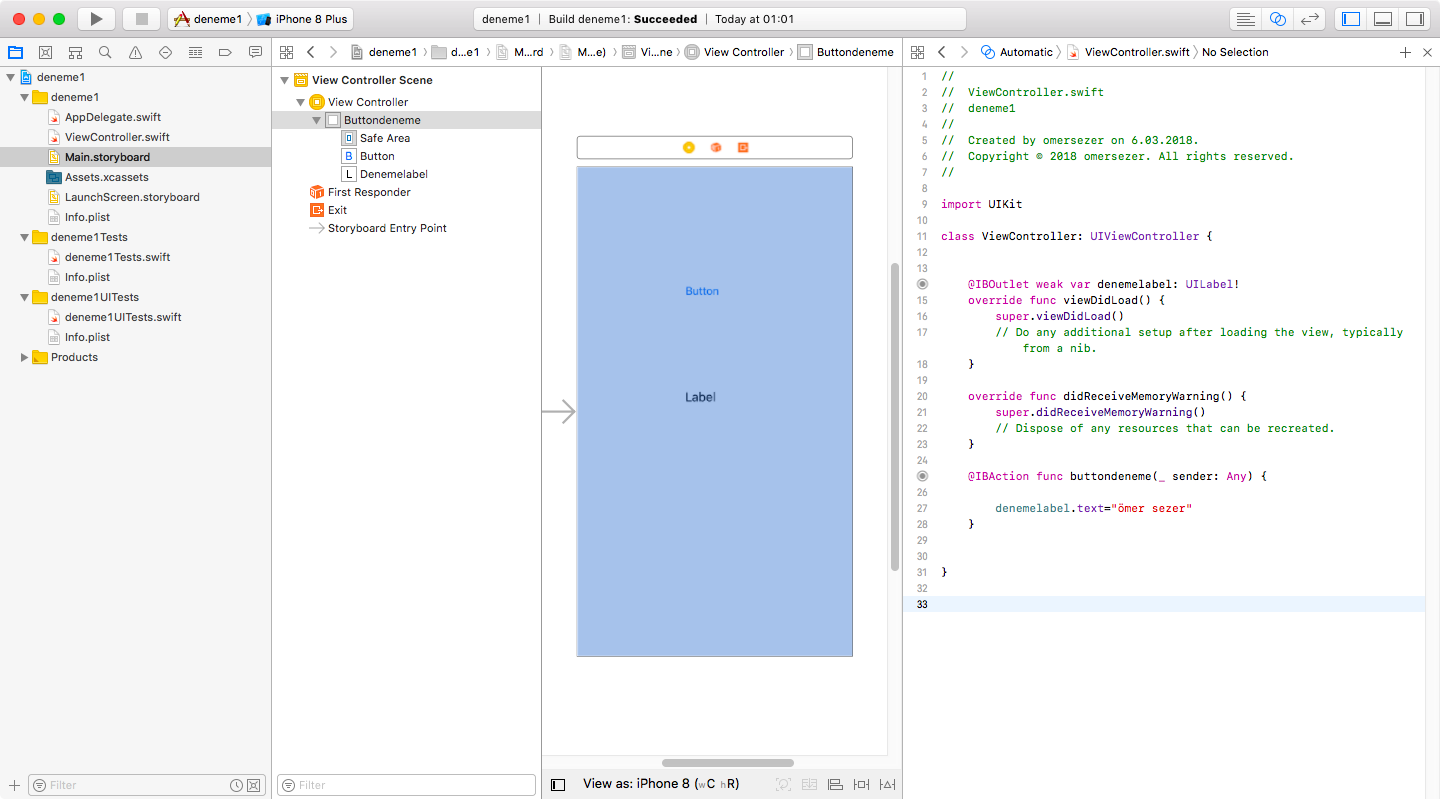
When we place the controller here, we come to the button click function and when we click on the button we change the text property of the label that we give the name.
In fact, we can summarize the difference between outlet and action. If you have any questions, you can reach us by email or comment.


Leave a Reply