The map now becomes necessary to use map, location in every application. I explained how to do these things for Xamarin. In this article I will explain how to do this with Swift. In order to use Google Maps with Xamarin, we needed to get an API Key from Google. We had to load the plugins. For Swift, we will handle them very easily without any need.
First of all, in our project, we have a .storyboard extension file and we add our Map Kit View object. We will show our map on this object. Let’s leave some space in the top and put a button here. This button will help us find our position. We create an outlet for our Map Kit View object. For the button, we create an action. This part of our design looks like this.

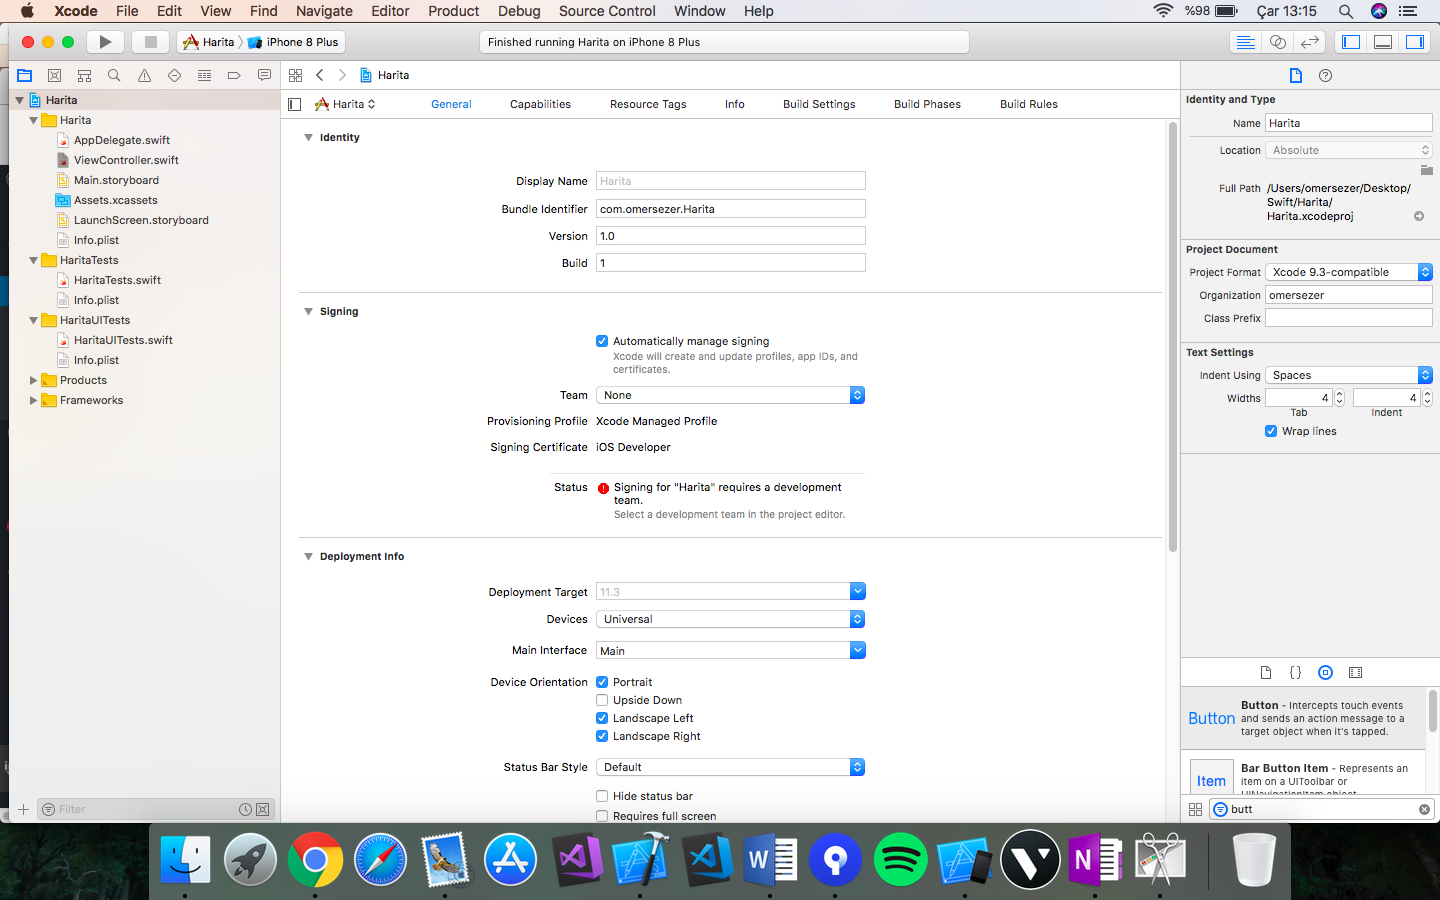
After we have finished the design part and created our outlet and actions, we can start writing our codes. First we need to add 2 frameworks. If we do not add these frameworks, the map object we added in the design section will also fail. There are 2 methods to add Framework. From these, we come to the top of the project – the map file at the top left – the file. My screen comes up like this.

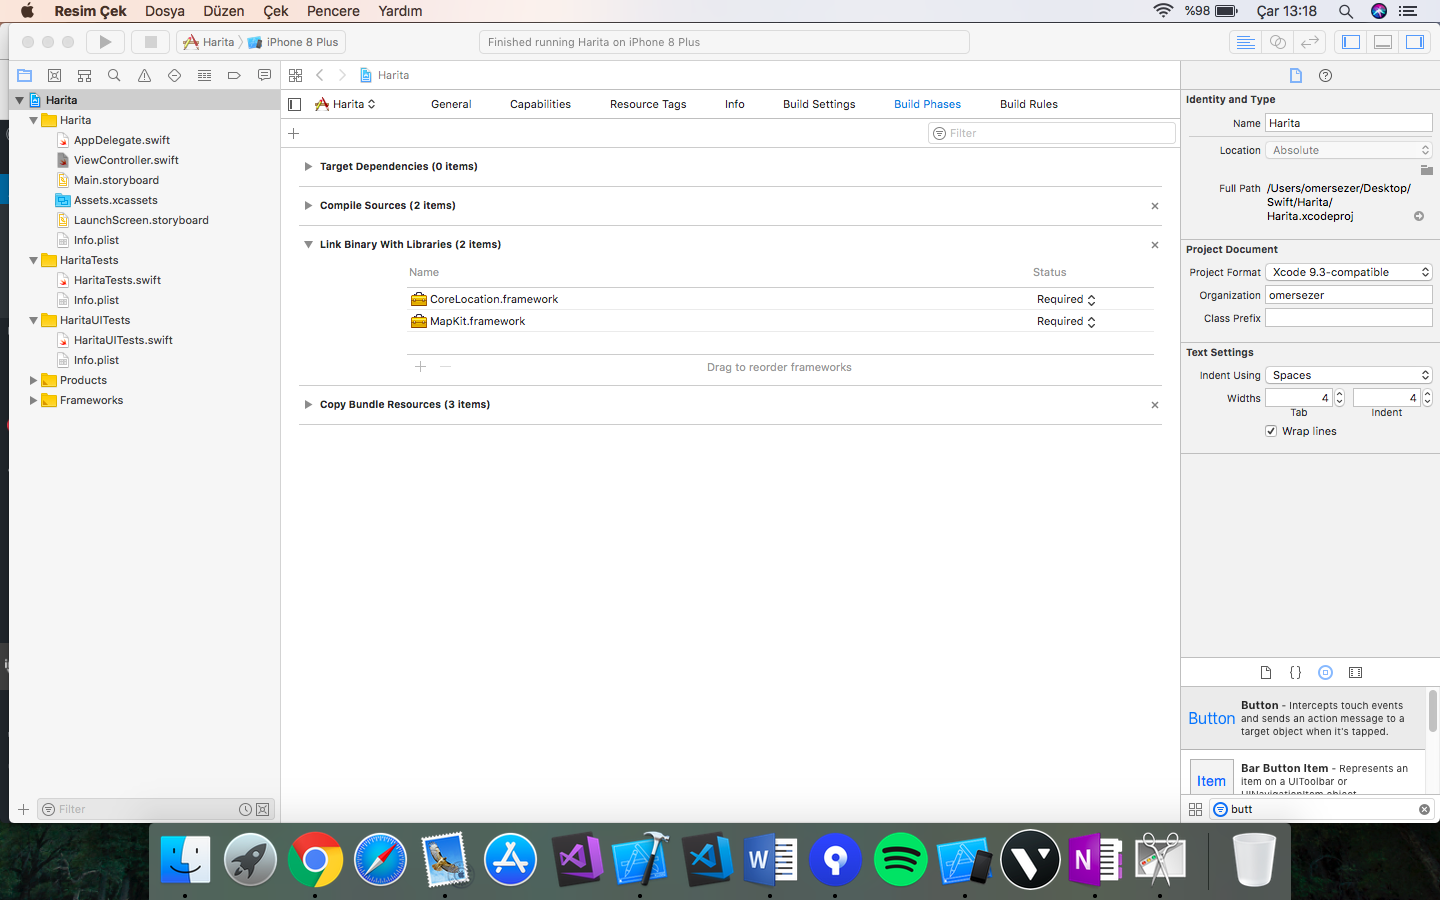
Here we can go to Capabilities and activate the Maps option. This is the simplest way, the other way is to add the individual framework. On the same screen again we come to the option of Build Phases. Under this option we will add 2 items into Link Binary With Libraries. MapKit.framework is a framework that will be added to your map object so that it will not fail and work properly. We added CoreLocation.framework to find our location.

Now we’re in code. First we bind class with CLLocationManagerDelegate. Then we create a map manager and start writing our codes. Each line of code is described with the description lines above the codes. In addition, the map is displayed in 3 different formats. These;
- Normal View
- Satellite View
- Hybrid View
harita.mapType=MKMapType.hybrid
class ViewController: UIViewController,CLLocationManagerDelegate {
    @IBOutlet weak var harita: MKMapView!
    var haritaYoneticisi = CLLocationManager()
    override func viewDidLoad() {
        super.viewDidLoad()
        // Do any additional setup after loading the view, typically from a nib.
    }
    @IBAction func YerimiBul(_ sender: Any) {

        haritaYoneticisi.delegate=self

        // İstenilen doğruluk oranını belirliyoruz
        haritaYoneticisi.desiredAccuracy = kCLLocationAccuracyBest

        // Bu sayfayı açtığında kullanıcı bu kod parçası konum kullanacağını kullanıcıya bildiriyor
        haritaYoneticisi.requestWhenInUseAuthorization()
        haritaYoneticisi.startUpdatingLocation()
        harita.showsUserLocation = true

    }
 //Bu fonksyion ile konum bulumu bittikten sonra olacakları yazıyrum
    func locationManager(_ manager: CLLocationManager, didUpdateLocations locations: [CLLocation]) {
        // ilk olarak kullaniciAlani adında bir değişen oluşturdu ardından bunun CLLocations tipinde olduğunu bildirdik.
        //Gelen locations değerleri arasından ilkini seçiyoruz ve bunun kullaniciAlani değişkenine atıyrouz
        let kullaniciAlani:CLLocation = locations[0] as CLLocation

        //Gerekli olan değeri aldıktan sonra harita yoneticisinin kendini güncellemesini durduruypruz.
        haritaYoneticisi.stopUpdatingLocation()


        // Sonrasında alan değişkeni oluşturup buna bir 2 boyutlu harita olmasını istiyoruz ardında koordinatları ise aldığımıza veriyoruz
        let Alan = CLLocationCoordinate2D(latitude: kullaniciAlani.coordinate.latitude, longitude: kullaniciAlani.coordinate.longitude)

        // Bölgenin ne kadar uzaktan açılmasını istiyorsak bunu belirtiyouz.
        let aralik = MKCoordinateSpanMake(0.8, 0.8)

        let bolge = MKCoordinateRegion(center: Alan, span: aralik)
        harita.setRegion(bolge, animated: true)

    }
}
If you have any questions that you have in mind, you can reach us by comment or mail.
Leave a Reply