
Hello friends, in this article we will talk about how we can create a UITableView with Swift. In some cases, UITableView may not be enough or you may want to manage it yourself. In this case we can do it with UIScrollView and UIStackView.
When we create our own UITableView, we will create 3 basic functions. These;
- How many Views will appear on the screen
- Which View will appear
- What will the view do when clicked
We will create a protocol for these first. In this way, we will be able to delegate our own UITableView over the UIViewController.
//
//  CustomStackTableViewDelegate.swift
//  custom-stack-table-view
//
//  Created by Ömer Sezer on 14.01.2023.
//

import UIKit

protocol CustomStackTableViewDelegate {
    func itemPressedAtIndex(index: Int)
    func itemForRowAtIndex(index: Int) -> UIView
    func numberOfItems() -> Int
}
After creating the CustomStackTableViewDelegate, we need to get an index in it to know which View was clicked. We can also create this with CustomStackTableViewTapGesture.
//
//  CustomStackTableViewTapGesture.swift
//  custom-stack-table-view
//
//  Created by Ömer Sezer on 14.01.2023.
//

import UIKit

final class CustomStackTableViewTapGesture: UITapGestureRecognizer {
    var index: Int?
}
Finally, we need to create a CustomStackTableView. This class will inherit from UIStackView and we will build on it. First of all, I define a Delegate here and we will do the transactions through this Delegate. Because I want a vertical list, I set the Axis property to vertical.
//
//  CustomStackTableView.swift
//  custom-stack-table-view
//
//  Created by Ömer Sezer on 14.01.2023.
//

import UIKit

final class CustomStackTableView: UIStackView {
    var delegate: CustomStackTableViewDelegate?

    override init(frame: CGRect) {
        super.init(frame: frame)
    }

    required init(coder: NSCoder) {
        super.init(coder: coder)
    }
}

extension CustomStackTableView {
    func configure() {
        self.axis = .vertical
        guard let delegate else {
            print("Delegate is nil")
            return
        }

        for index in 0...delegate.numberOfItems() - 1 {
            let item = delegate.itemForRowAtIndex(index: index)
            item.isUserInteractionEnabled = true

            let tap = CustomStackTableViewTapGesture(target: self, action: #selector(handleTap(_:)))
            tap.index = index

            item.addGestureRecognizer(tap)
            self.addArrangedSubview(item)
        }
    }

    @objc private func handleTap(_ sender: CustomStackTableViewTapGesture) {
        guard let delegate, let index = sender.index else {
            print("Delegate or index is nil")
            return
        }
        delegate.itemPressedAtIndex(index: index)
    }
}
Finally, you can use it as follows.
//
// ViewController.swift
// custom-stack-table-view
//
// Created by Ömer Sezer on 14.01.2023.
//
import UIKit
class ViewController: UIViewController {
@IBOutlet private weak var tableView: CustomStackTableView! {
didSet {
tableView.delegate = self
tableView.configure()
}
}
override func viewDidLoad() {
super.viewDidLoad()
}
}
extension ViewController: CustomStackTableViewDelegate {
func itemPressedAtIndex(index: Int) {
print("Item pressed at index \(index)")
}
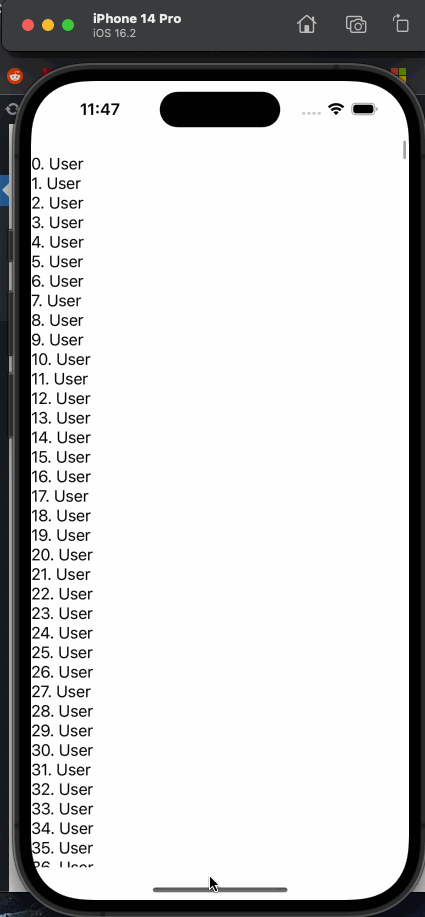
func itemForRowAtIndex(index: Int) -> UIView {
let label = UILabel()
label.text = "\(index). User"
return label
}
func numberOfItems() -> Int {
return 1000
}
}
Of course, the CustomStackTableView we created must be in the UIScrollView for the list to scroll on the screen.

You can find the project we created here. You can find more articles about Swift here.
If you have any questions, it will be enough to reach me by sending an e-mail or comment. Good work.
Leave a Reply