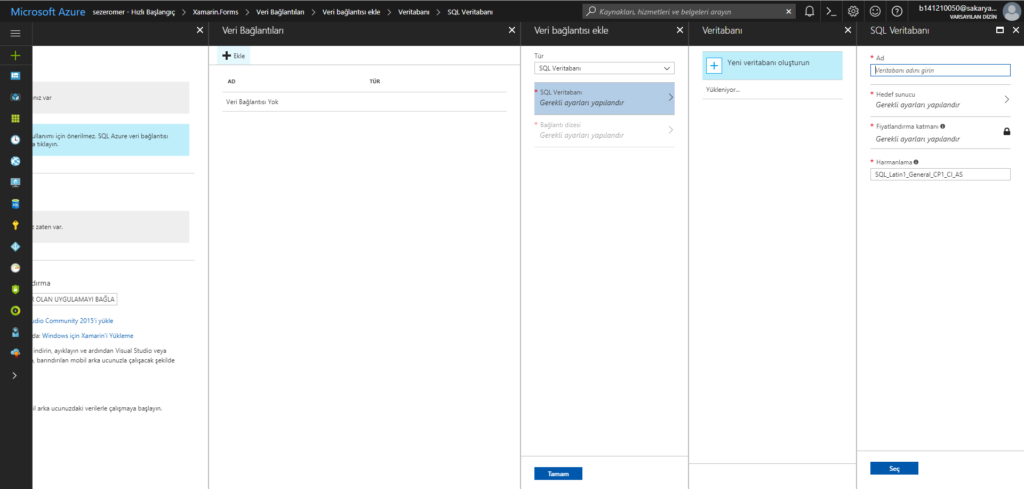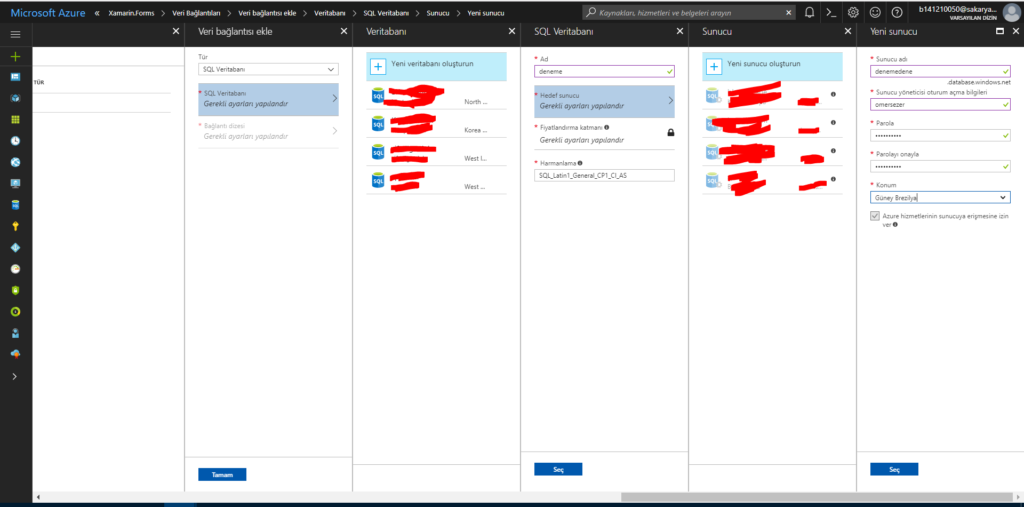
As I noted in Part 1, the data link page we clicked on will say “SQLite can not be used for efficient production”. We need to add a data link from this page. We will add a SQL database by pressing the “Add” button. The database creation page is displayed when we click on the Configure the required settings option. We want to enter the database name here, and then we will configure our server.

The server configuration mentioned here is very important to us. Because we will use the information here in the future when connecting your data. When choosing a location, it will be better for you if you choose a region that you have not created before. After filling in all these data, we create the database by selecting each page. It may take some time depending on your internet speed. You should wait a bit.

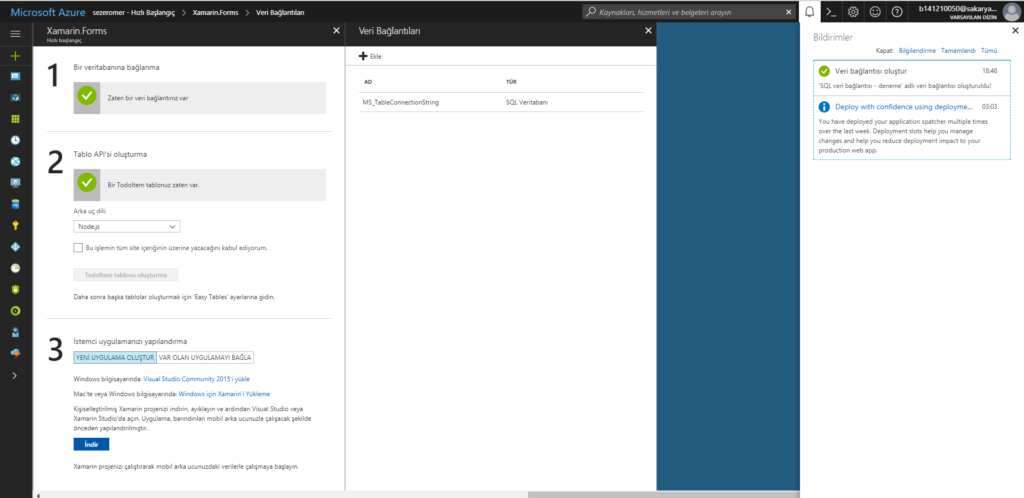
When SQL database is created, you will see this screen below. So now we have opened the database online. Of course, it is important if we organize it after we create the data base. For that, Azure shows us methods in a very simple way. He even goes so far as to let us down the project. Of course, we need to choose the backend language C # for this. Then we download the project to my computer.

After downloading the project to the computer, you will need to open it with an editor. I would prefer Visual Studio. You can open it with any editor, but I recommend Visual Studio.

When you open the project you will see folders like Data Objects, Model, Controllers, App Start. The project already comes with the TodoItem table as an example. If you want to create a new table. First you need to create your table in the model data objects folder. We add the data object we created later to the Context class in the model part as DbSet. If you publish after publishing the Controller, your table will be created. Then you can look at the data base. You can get help here to look at the database on Azure. I will write the Web Service authoring topic in more detail in the future.
Leave a Reply