
Hello friends. In this article, I will talk about an activity that we will frequently use in mappings. I’m talking about making pins. In order to show a place in the maps we need to indicate a symbol on it. We call it pin. We showed how we were going to be in Xamarin. In this article I will talk about how to create with Swift.
First we need to specify the position of the pin we will create. I am creating a variable of type CLLocationCoordiante2D. This variable takes 2 variables, X and Y position. Thus, we have created the position of the pin.
let ilkKonum:CLLocationCoordinate2D = CLLocationCoordinate2D(latitude: 40.773074, longitude: 30.394817)
After you specify the pin position, we need to create the pin. We do this with the MKPointAnnotation () function. We then assign the coordinates that we have formed to these pinin coordinate properties. Then we add a pine cap. This head will appear under the pin in a big way. We then make a subtitle assignment to display more information. The last thing we do is add this map to the map with the addAnnotation () function.
let pinSakarya= MKPointAnnotation()
// açıklamaya kordinat ekliyoruz
pinSakarya.coordinate = ilkKonum
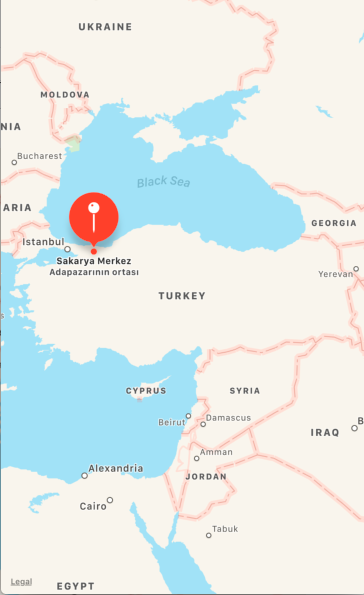
pinSakarya.title = "Sakarya Merkez"
pinSakarya.subtitle = "Adapazarının ortası"
self.harita.addAnnotation(pinSakarya)
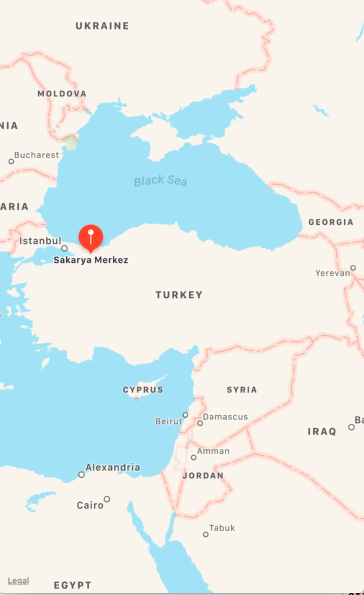
The pin looks like the photo below on the map.
When you click Pine, the icon size is growing and the subtitle appears.
If you have any questions, you can reach us by email or comment.
Leave a Reply