
Hello friends. In this article, we’ll look at how to create a split list into two or more numbers with SwiftUI. In my previous article, we talked about how to create a list. You can find it here. In this article, we will develop this a little more on the forehead.
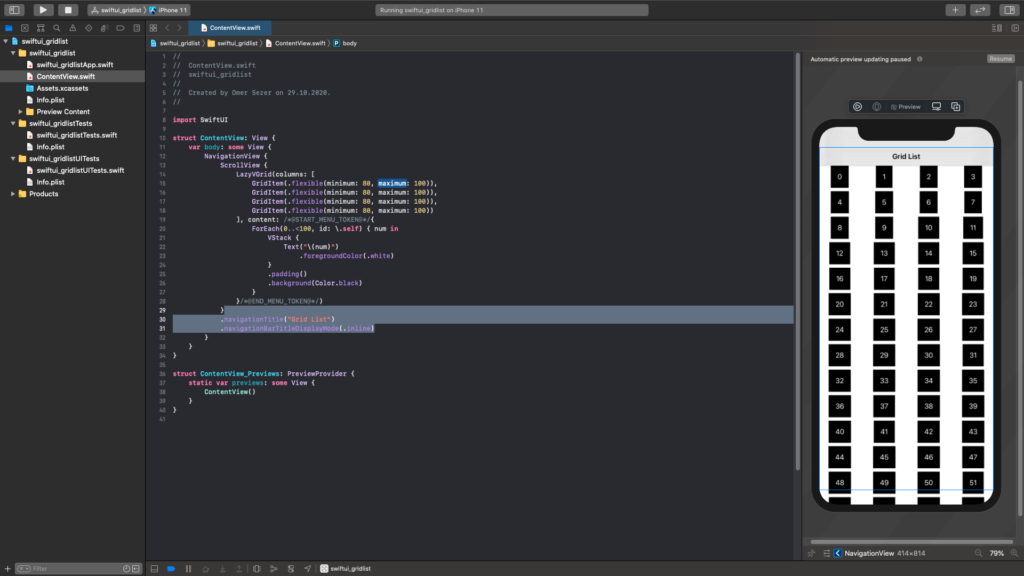
First I add a Navigation View at the top. I add Scroll View into it. The reason for this is that sometimes the data may be too much or the user can use a phone with a small screen. We need to consider these and make sure that the screen can scroll up or down. We have added a Scroll View to the outermost for this. Then we need to divide the screen into grids. Here it is important how much we will divide the screen. I will divide it into four for an example. You can still change it according to your own design. First I add LazyVGrid. This means that the grid that can move vertically is actually. When you create such a controller, it tells us how much we will divide and what will happen in it. As you can see here, he wants an array of GridItem type for columns from us. Since I will divide it into 4 columns here, I am creating 4 GridItems. I will write an article with more information about GridItem soon. You can also follow him here.
After creating 4 GridItems, I go through the content section. You can use a lot of controllers here. I am giving an example, if you want to put pictures that change according to the size of the screen, you can create 4 Images. He places them on the screen in their order. Here I am doing it with ForEach as there may be too many variables depending on the list. You can also submit a model here. For simplicity, I turned with for and put only Text on the screen. You can fill the content as you wish.
//
//  ContentView.swift
//  swiftui_gridlist
//
//  Created by Omer Sezer on 29.10.2020.
//

import SwiftUI

struct ContentView: View {
    var body: some View {
        NavigationView {
            ScrollView {
                LazyVGrid(columns: [
                    GridItem(.flexible(minimum: 80, maximum: 100)),
                    GridItem(.flexible(minimum: 80, maximum: 100)),
                    GridItem(.flexible(minimum: 80, maximum: 100)),
                    GridItem(.flexible(minimum: 80, maximum: 100))
                ], content: /*@START_MENU_TOKEN@*/{
                    ForEach(0..<100, id: \.self) { num in
                        VStack {
                            Text("\(num)")
                                .foregroundColor(.white)
                        }
                        .padding()
                        .background(Color.black)
                    }
                }/*@END_MENU_TOKEN@*/)
            }
            .navigationTitle("Grid List")
            .navigationBarTitleDisplayMode(.inline)
        }
    }
}

struct ContentView_Previews: PreviewProvider {
    static var previews: some View {
        ContentView()
    }
}
If you have questions, you can reach by e-mail or comment. Good work.
Leave a Reply