One of the main reasons for using Xamarin is that we do not work cross-platform. This is the side that separates Xamarin from other platforms. We can compile Android and UWP platforms very easily. It is not so easy for us to say this for loser iOS. We need to have a MacOS device for this. Of course, it just does not have it. We need to install a few programs so we can connect with Visual Studio. Downloadable programs:
- XCode
- Visual Studio For Mac
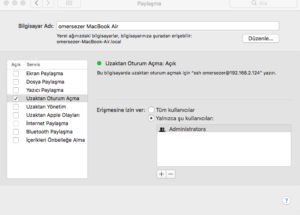
In these two programs, the installation is included in our page. After installing these programs, we need to make a few more changes. We need to remotely control our Mac device. We need to turn on the remote login option in System Preferences> Sharing.
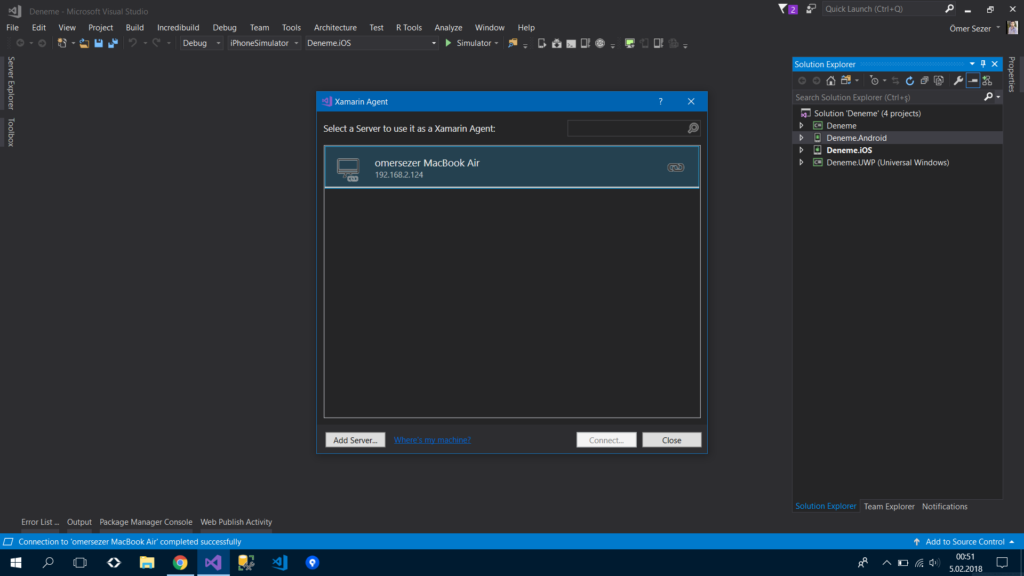
Then we’re done with our Mac. Then we need to do our Windows operations. This requires Visual Studio 2017 Enterprise installed. We are entering Visual Studio and we will make the connection from here. We are opening our project. Next to the Build button is the Xamarin Mac Agent button. We need to be in the same network to be able to connect with a Mac. When we open Xamarin Agent, he sees my Mac device and all we have to do is press the connect button. After a few minutes, the connection process is being established.
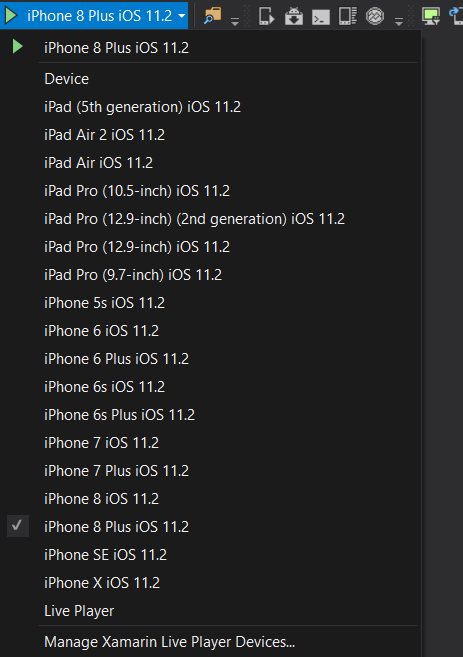
After that you decide what device you want to run your application on. I will run it on the iPhone 8 Plus.
After the Build button is pressed, the first time you switch on the device may change depending on your internet speed. He usually does not get a minute.
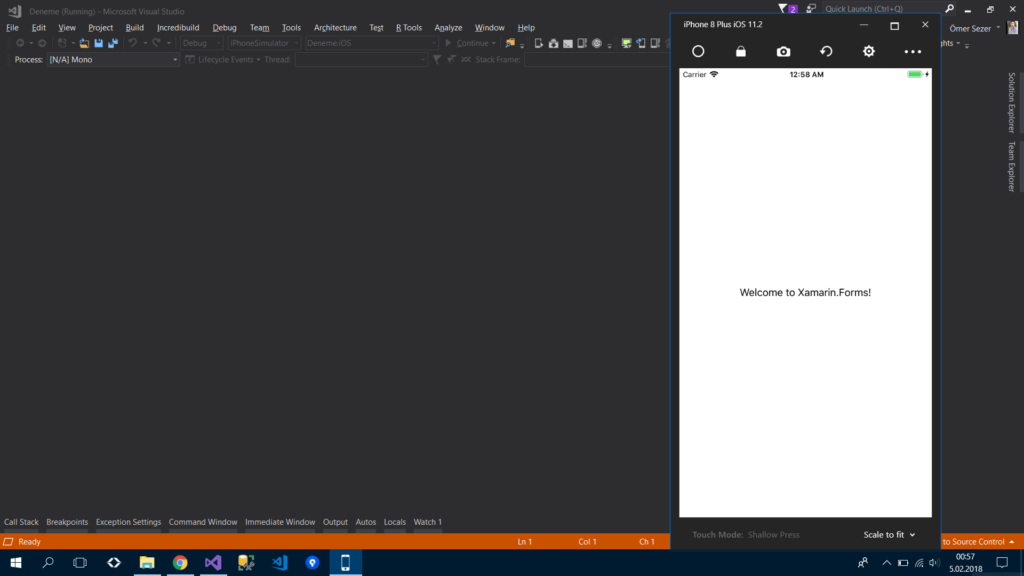
After that, you can work with your stool. If you have any questions, you can reach us by email or comment.
Comments (4)
Sinansays:
Wednesday February 20th, 2019 at 09:06 AMVisual Studio 2017 Enterprise sart degil, diger iki (Comunity, Professional) surumude uygundur Xamarin icin.
omersezersays:
Friday February 22nd, 2019 at 11:28 AMTeşekkürler uyarınız için. En kısa zamanda düzeltiyorum.
cnrdsays:
Wednesday April 15th, 2020 at 10:14 PMpeki bu şekilde windows için masaüstü uygulamları geliştirebilir miyiz c#’da
omersezersays:
Thursday April 16th, 2020 at 08:41 AMMac ortamında Windows mu geliştirmek istiyorsunuz?