
Nowadays, without the internet we can not think an app. Except the simple app almost every app need a database. Because users may want to hide the data and offer the actions which users will enjoy in the future. For that we need the keep our data on an online database. Azure show that with Xamarin easy way. For that we need to have things; Azure account and little bit reading and writing.
You need to have Azure account for this things. If you study universtiy, Azure is free for you but not all features. These features enough for this writing. If you are not a student, you have to login with a credit card and they will give you 200$ budget. Later you can always delete the your credit card and you can login with an another credit card and they will give you 200 budget again. I think this will be enough for your starting.
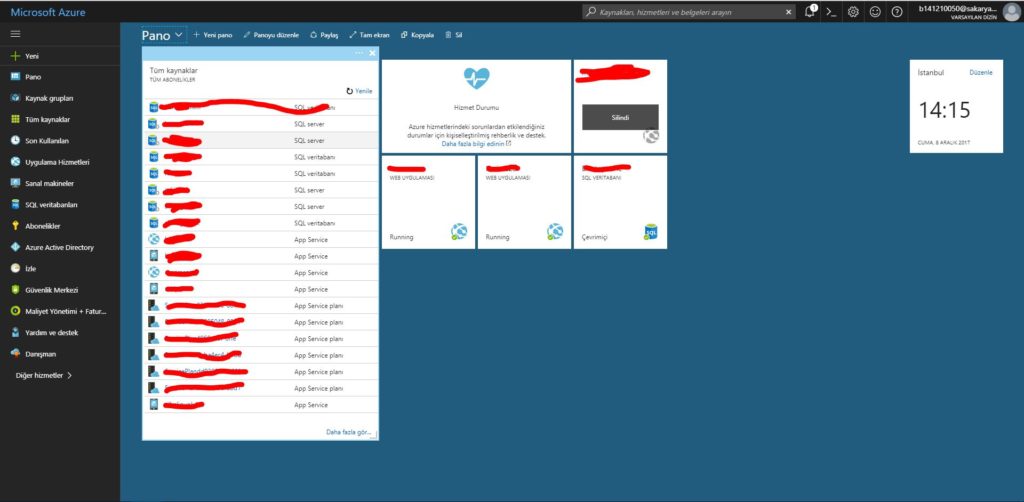
When you login the Azure, you will see the that screen.
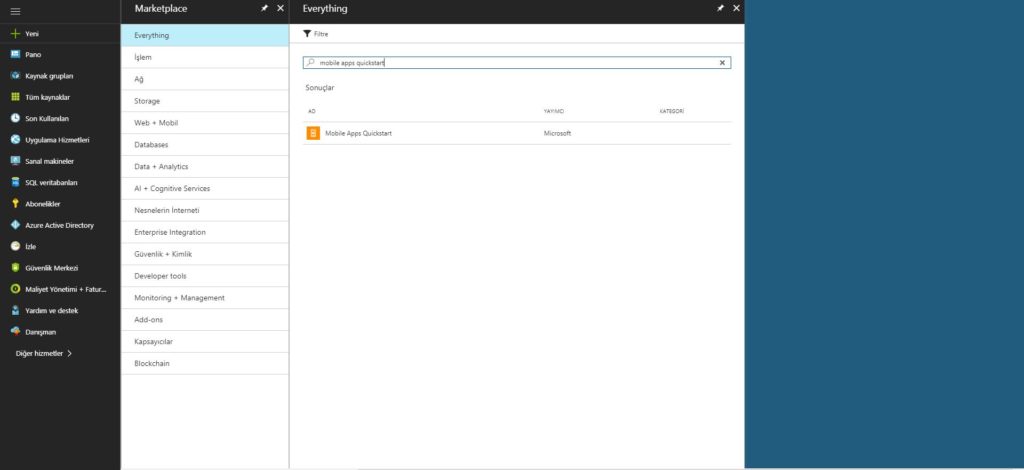
If you have project you will see in this screen.Today we will open the new project.For that we click the new tab button.Here there are projects which you may want to open but we know the our project and we click the search button then we write The Mobile Apps Quickstart and we will choose it. Mobile Apps Quickstar download sample project with an Sqlite connection for us or if you have project,Mobile Apps Quickstar show you how can integrate with your project. Mobile Apps Quickstar present to us project which you can be Authenticate in Google , Facebook, Twitter and Microsoft.
When we write Mobile Apps Quickstar there will be a screen like in the below.In this screen we can decide our app name, our subscription and if we have resource group , we have screen which offer to us select the resource group or create a new one. My account is a school account , so it shows my subscription as DreamSpark.As i mentioned at the beginnig of the article , you can open a trial account or if you know a student who close to you , you can use it for testing.I choose the all options and i click the create button.Creating a project depend on the internet speed.It takes long time but dont worry.

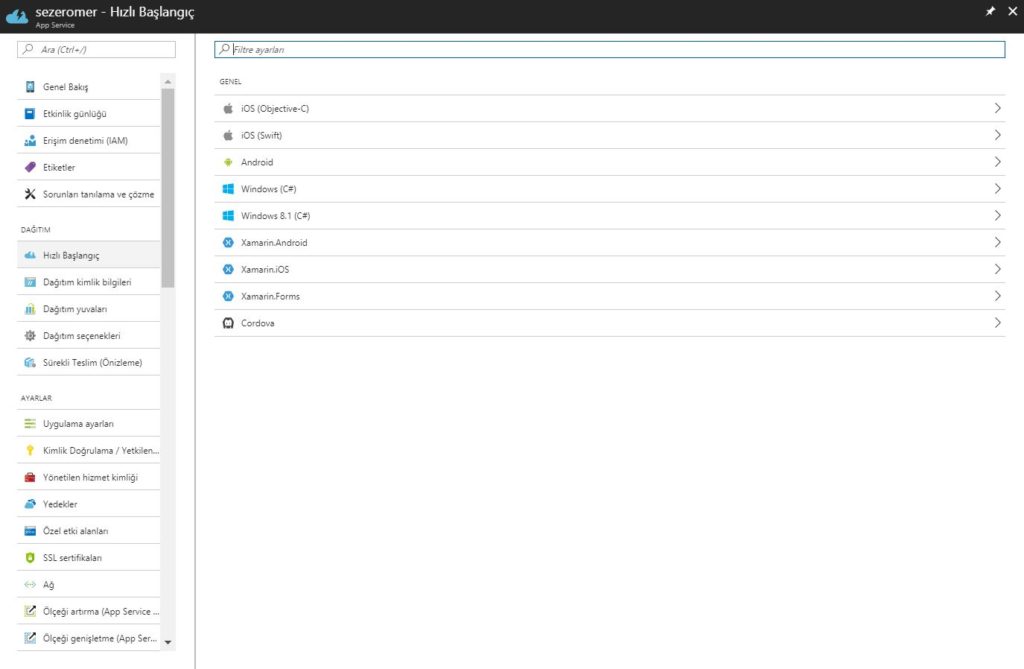
When you create the project you can see on main page.When you click the your project you will see the like this screen.In the side tab you can reach the almost every setting about your project. I will click the quick start and i will start downloading the my project which already SQLite connection.Here there is not just Xamarin.Forms every language and every platform in there.This prove the Azure is good cloud system.If everything read,it will directly download the project.If you write the app for the java and android or if you write İOS app with the Swift, Azure already think them for you.I click the Xamarin.Forms because i will write the Xamarin.Forms app.
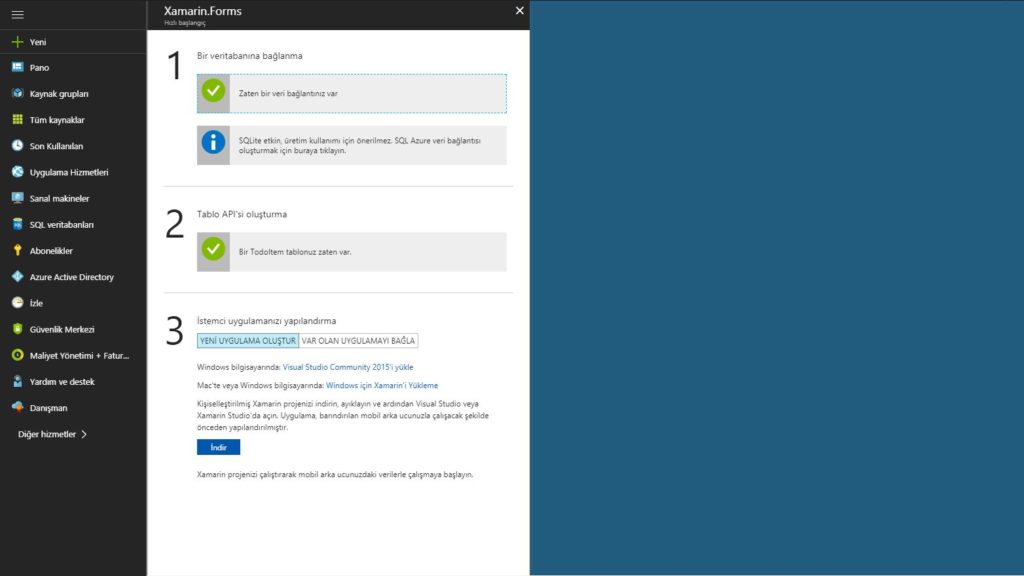
When i click the Xamarin.Forms button this page come.This page talk about the step by step.First step talk about the we have a database on our app but it suggest we should use this for sample projects.For the bigger project it want to us build SQL connection .You may find the article about that in coming days.For the second step it want from the us create a chart.Project already checking with a sample TodoItem chart .In the last step it ask to us if we may want to create a new project or integrate with already existing project .Today we will create new project but we already have a project and if we need a basic database ,Azure tell us step by step how can we connect with the project. I download the project.
When you open the project you will see the this screen.In the Constants class it will create a URL with the name of the your project for you.Thanks to this URL you can exchange the information . There is a model in the TodeItem class. We apply the data in model with the this model or when we add a model we apply the these things.TodoItem Manager is the place which you saving,deleting,reading updates.Of course, when we have done this operations we have to show on a page.Thanks to TodoList.xaml page you can easly make these.When you download the project, these classes and files are added directly.
Comments (1)
Yusuf ESENsays:
Monday January 1st, 2018 at 03:01 PMBu faydalı döküman için teşekkür ederim. Ellerine sağlık.