Sometimes you might have opened your projects with a ridiculous name and continued over it. But instead of opening a new project for the rest of the future, it would be more logical to change the name of the existing project. That’s what I’m going to talk about today.
To change the name of your project, first go to the file location where your project is located and change it. Then you go to where the file with the extension .sln is, and you open this file with the notepad. Your screen comes up like this.
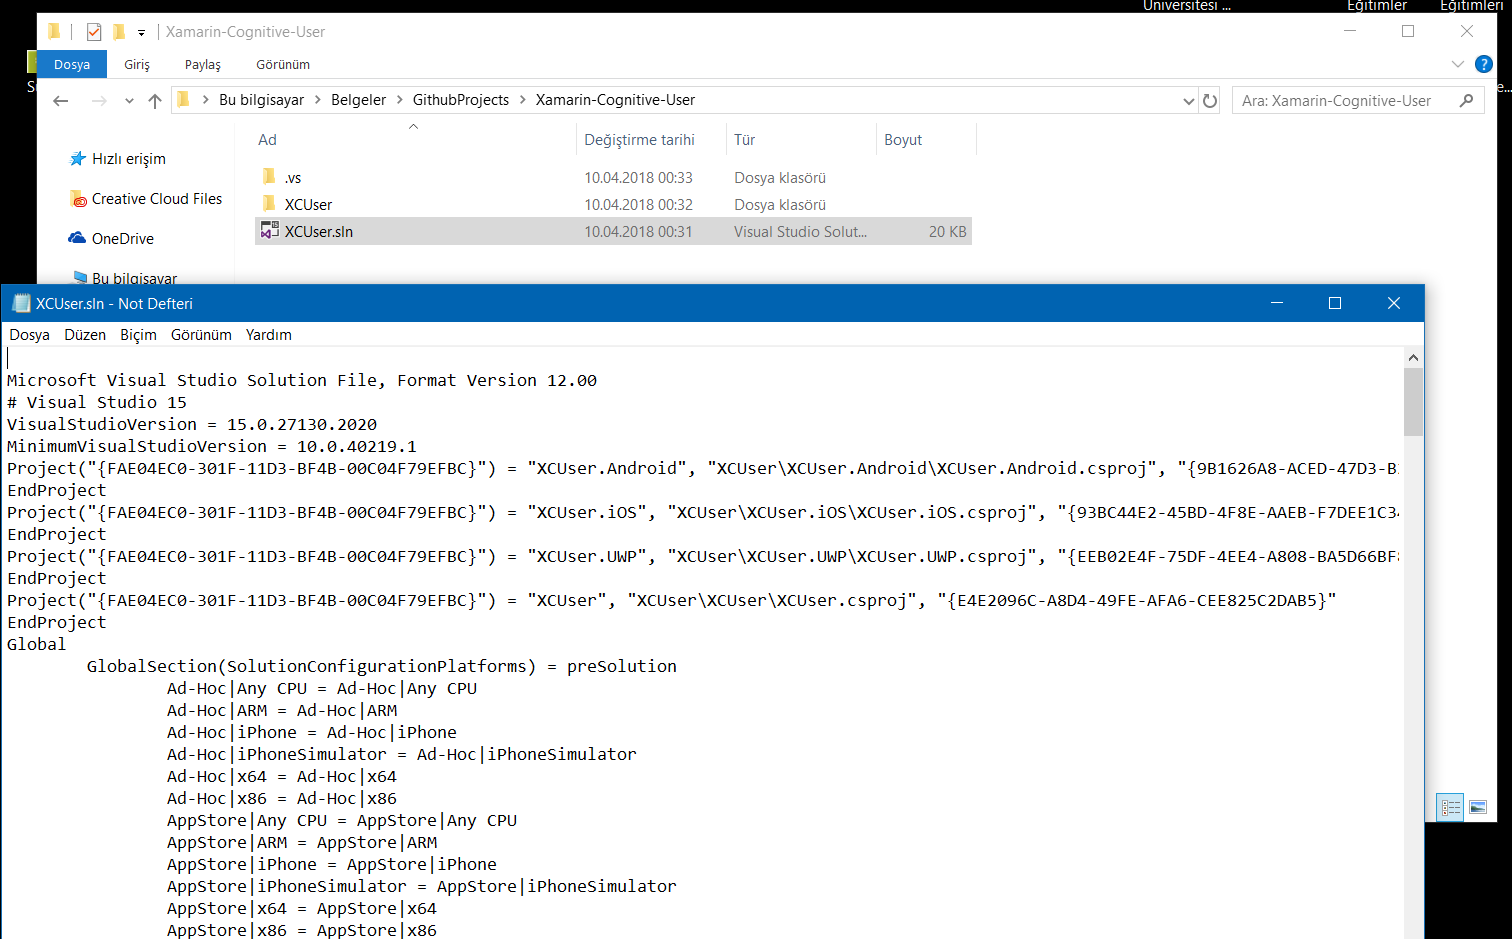
Here is the name of the progeny here. If you want to put the name you need to change it with XCUser. This was the most important part. You need to save this file and exit it. Then again you are in folders.

Now you need to change the names of all these folders and the names of the files that stand with their old name. That’s it. You can then open the progeny and use it under a new name. If you encounter an error or a project can not be loaded, it is useful to check the filenames and extensions.
If you encounter a problem, you can contact me by comment or mail.
Comments (1)
AYHANsays:
Tuesday January 17th, 2023 at 10:22 AMHocam mükemmelsiniz…