The most important part of an application is its design. Although it is nice, it is not long-lasting to use as long as the user does not like the design. Of course, it is also the first icon in design. In this article, I will talk about how to change the icons of b applications in Xamarin Forms.
First we need to set the icons for iOS. We need to adjust the size of the photo you selected as an icon for this. Apple is very strict in this regard. The dimensions of the photo should be as follows. Otherwise it will always fail.
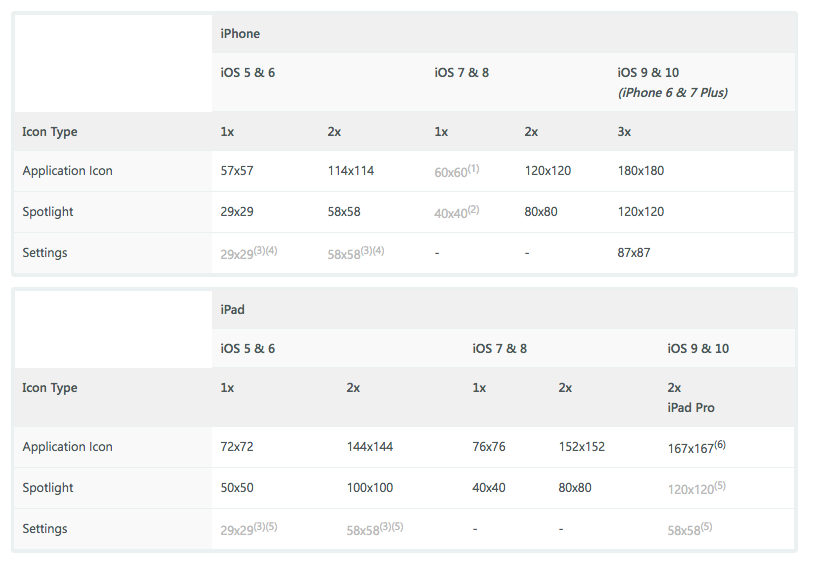
It is very annoying and unnecessary to do them all by hand. There is a website that handles these very easily. When you put the photo on this site, the icons created in all the formats are sent to your e-mail address. You can get it here. The photos we have created in accordance with Apple come to the iOS layer of our project and place them in the Resources section. After that, MacOS and Windows will be different. For MacOS, we need to select photos directly on the Assest.xcassets screen in the iOS layer.
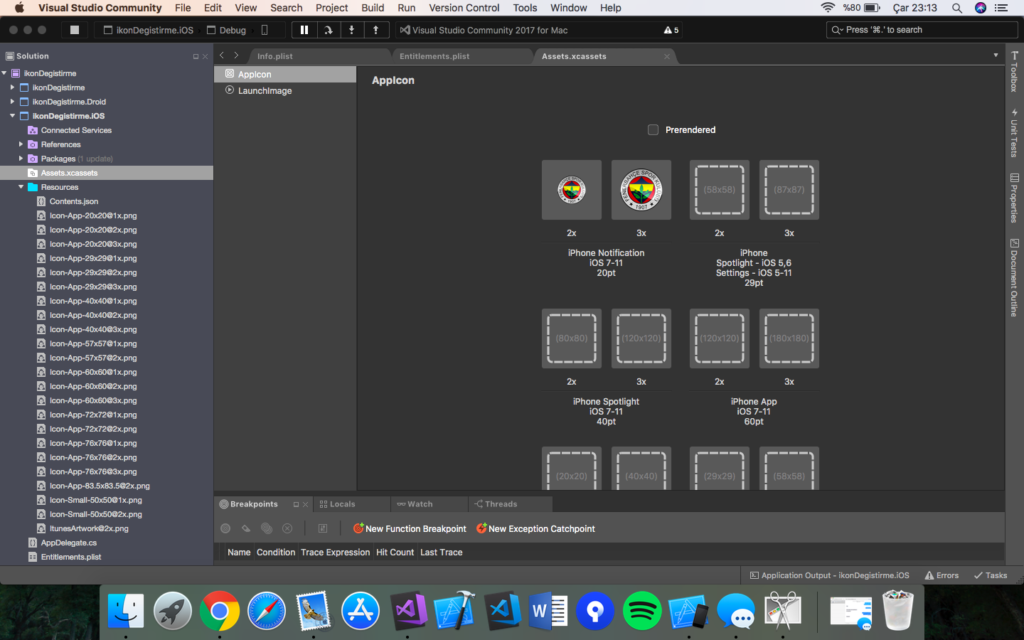
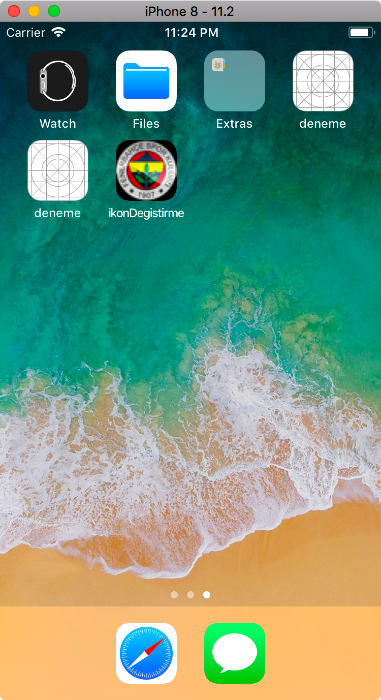
From here, match all the photos to their size. When you compile the project you will see that the icon changes. We are entering the Media section for Windows. In the Appicons section, we map again.
If you want to reach the project you can reach it via github or here.
If you have any questions, you can reach us by email or comment.
Leave a Reply